Templates are one cool way of manipulating content in Drupal 7 as they allow you to alter or add additional HTML markup to your pages. In this post we will be creating a template for a specific content type. In this example, it will be a new content type for products:
Add a Content Type
Go to admin > structure > content type
Add Content Type > Products
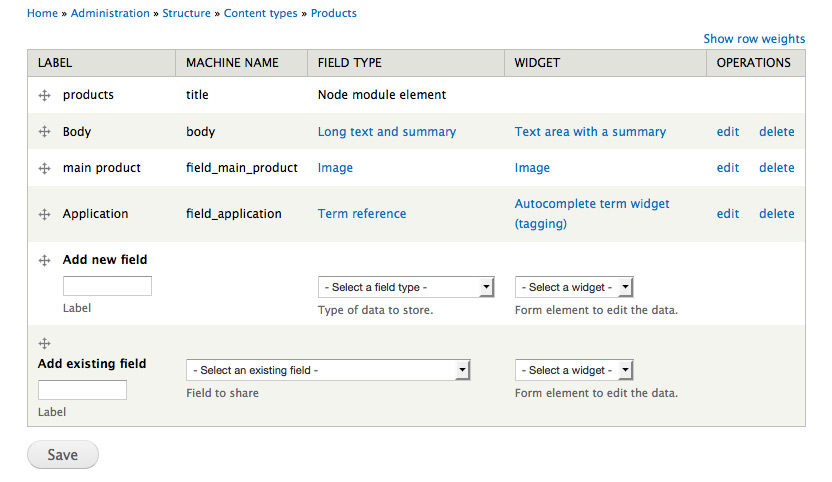
Add fields that you want. We are using the title, body, field_main_product for an Image, and field_application fields for a product category, “Application”.

Next, organize the way the content displays (order, hide labels, etc) in Manage Display

Add a Content
Add your products pages: text, images and titles and create content. Rinse. Repeat.
Use Devel to identify field names
Download and install the Devel module.
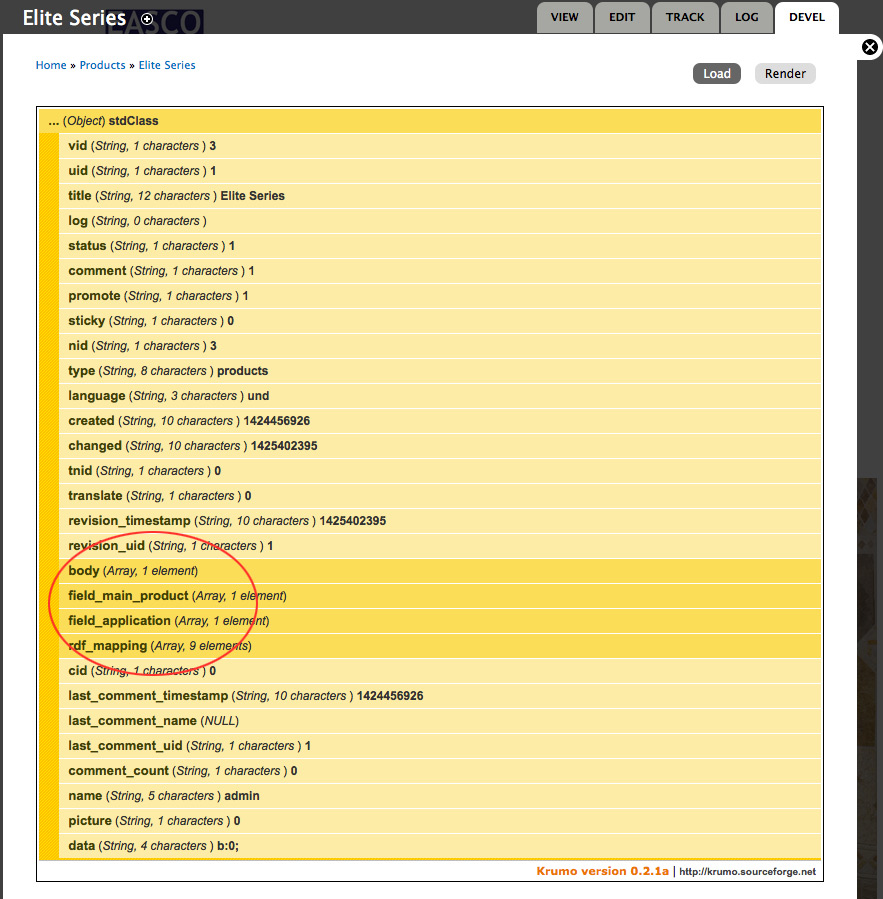
Activate devel. Go to one of your products pages and you will now get a tab that says devel.
Click the Tab and Igentify the fields you are going to use in your template.
***Be sure to turn devel off when you are finished because you will take a major performance hit when it is turned on.****

Create a Custom Template
Go into your Theme (if you are using a base theme you will need to go into the base theme)
Go into your templates folder and download the files node.tpl.php and page.tpl.php. If these are not provided by your theme, you can find the default Drupal templates at /modules/node/node.tpl.php and /modules/system/page.tpl.php in your Drupal installation.
You can work with either file for what we are doing. However, for this example we are going to use node.tpl.php.
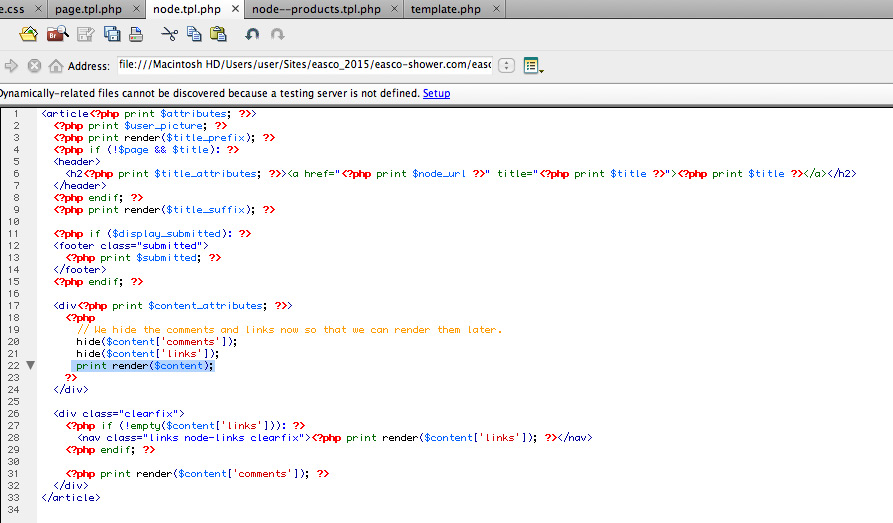
See Print Render Content Tag highlighted below ( that is where your content is added) this is where we are going to add/edit content

Go to your site and find the machine-name of your Content Type > ours is called “products”.
Open node.tpl.php in Dreamweaver or other text editor and save as node–maching-name.tpl.php. In this example, we save as node–products.tpl.php.
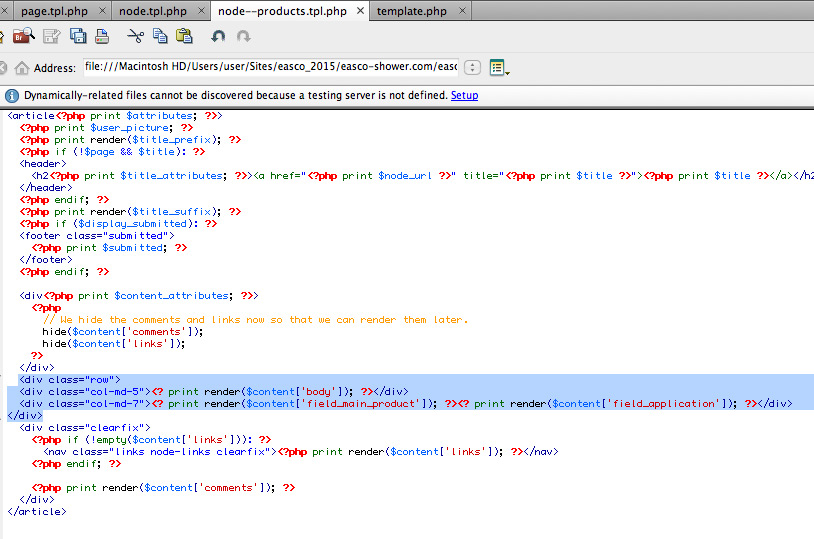
Since we only want to use the fields in the Content Type, we are going to remove Print Render Content Tag.
Add the HTML and field declarations below. (we are adding Bootstrap classes to create a 2 column layout but you can add any HTML you want.)

Upload into your themes Templates Folder, clear cache under Performance, and You Have Created A Custom Content Template!